Walu Guide
Learn how to use Walu step by step: from your first transaction to budgets, goals, credit cards, and shared spaces.
Create your account
Sign up with email and password, then verify your inbox.
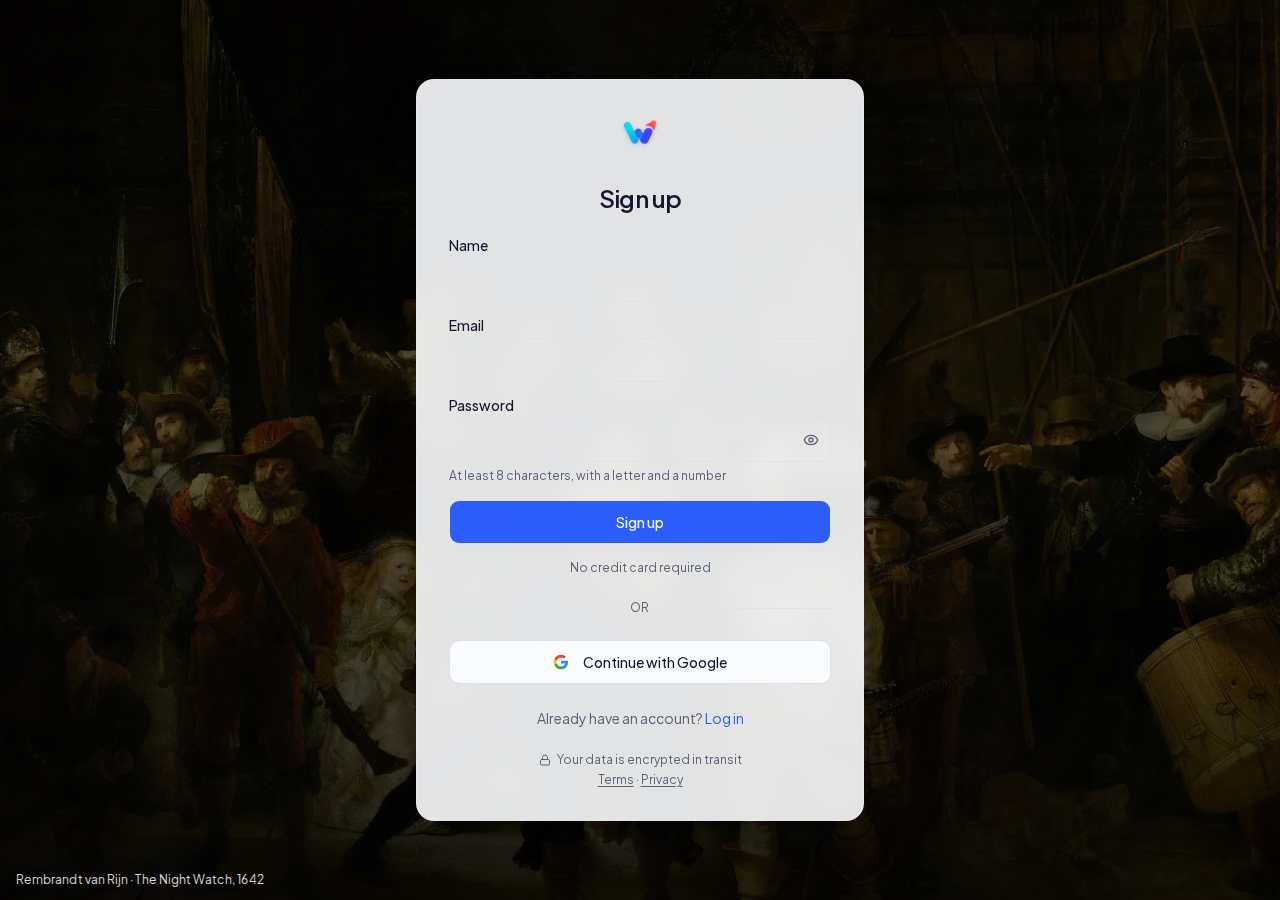
- 1Enter your email (1) and choose a strong password on the registration form.
- 2Tap Create account (2) to submit the form.
- 3Open the verification email we sent you and click the link (3) to activate your account.
Initial setup
Set your name and primary currency when you first log in.
- 1Enter your name and choose your space's primary currency (1).
- 2Confirm your timezone and tap Get started (2) to create your personal space.
Your first transaction
Record an expense or income in seconds from any screen.
- 1Tap the floating + button (1) to open the new transaction form.
- 2Fill in the amount, type (expense/income), account, and category (2).
- 3Tap Save (3) to record the transaction and see it reflected in your balance.
Accounts
Create and manage your bank accounts, cash, cards, and more.
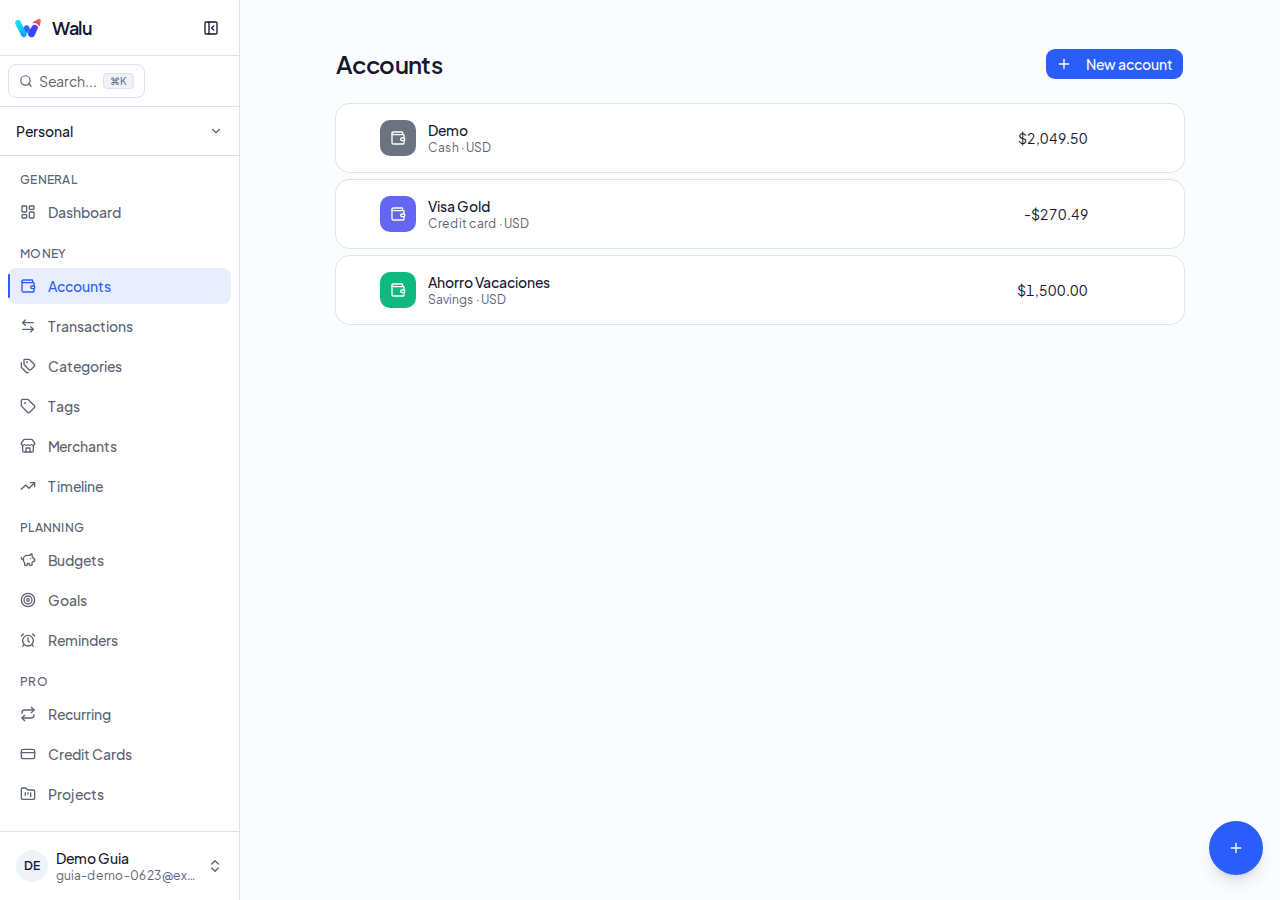
- 1Tap Add account (1) and choose the type: bank, cash, card, savings, or investment.
- 2Fill in name, opening balance, and currency, then save (2) to see the account in your list.
Categories
Organise income and expenses with your own categories and icons.
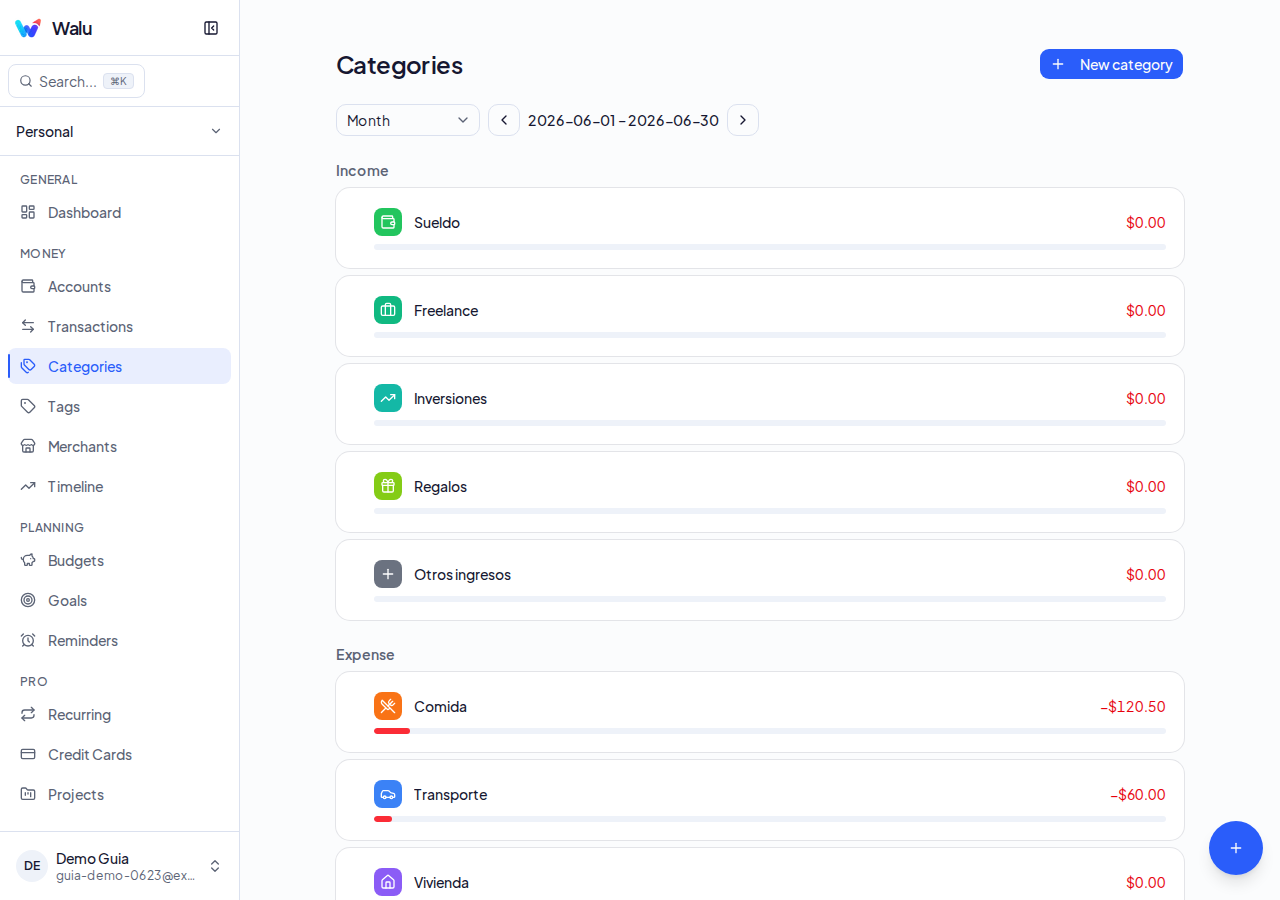
- 1Tap Add category (1) and choose whether it is income or expense, then set name, icon, and colour.
- 2Save (2) to use the category when recording transactions; create subcategories from the parent category card.
Tags
Label transactions with coloured tags to filter later.
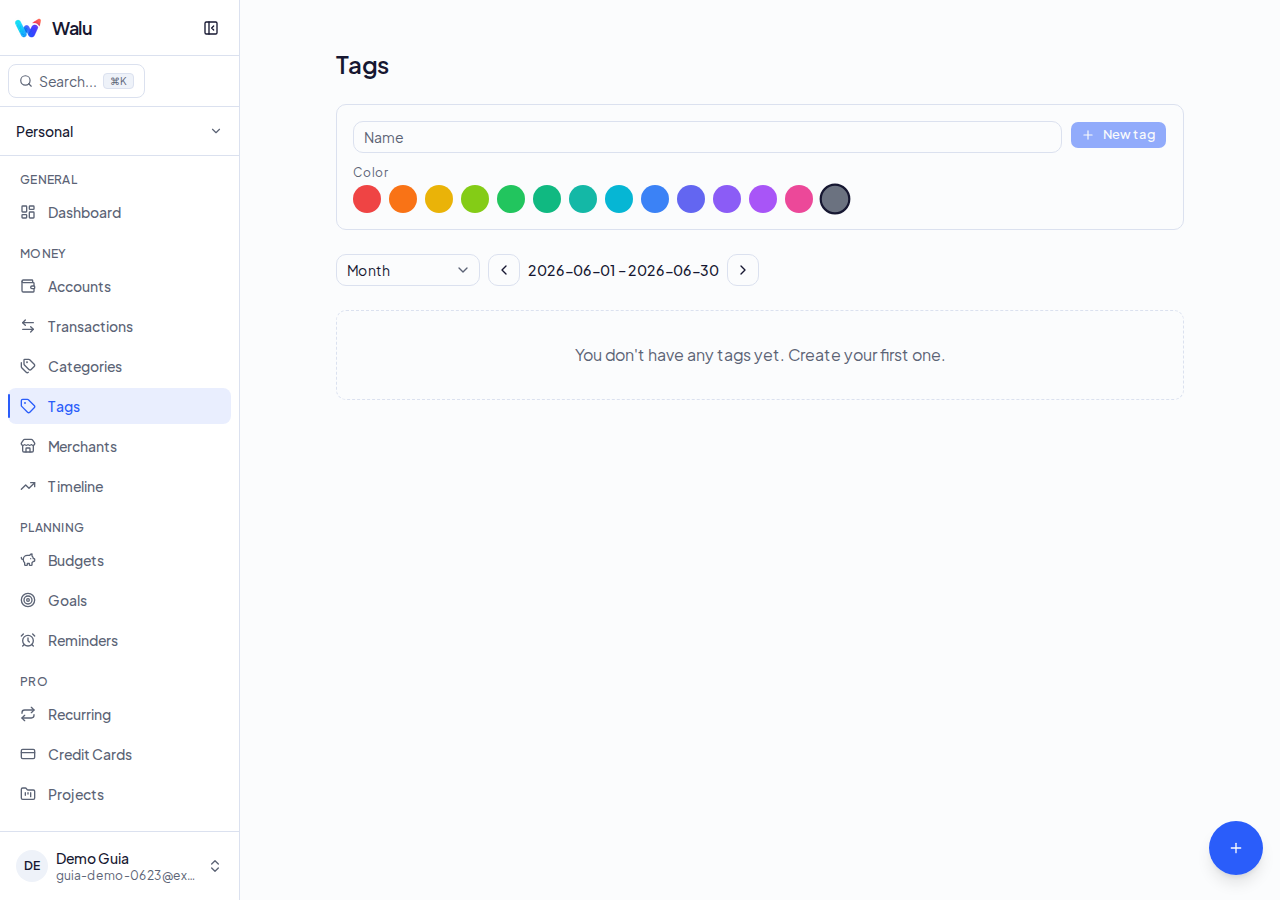
- 1Tap Add tag (1), type a name, and choose a colour.
- 2Save (2) and assign the tag to transactions from the transaction form.
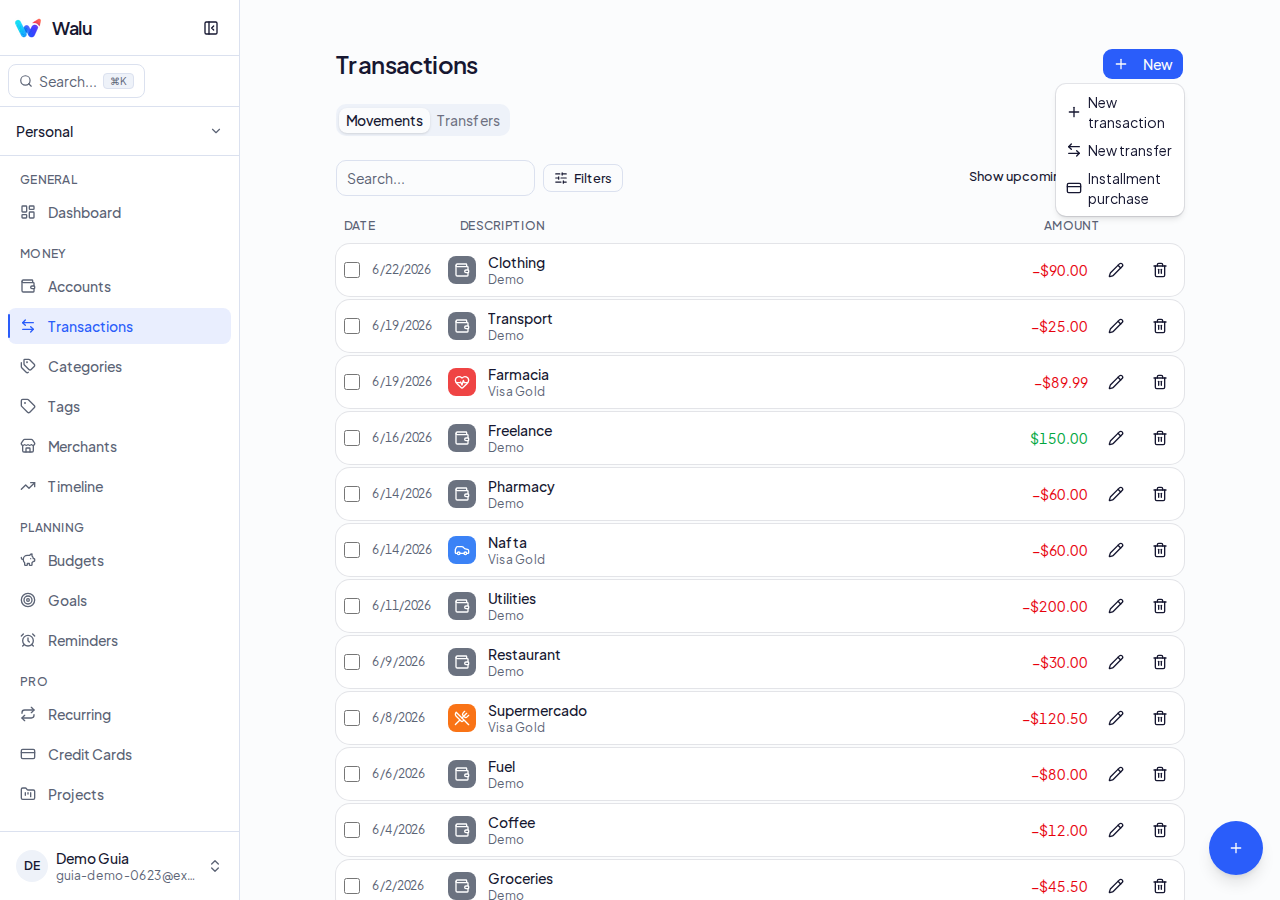
Transactions
Record, filter, and manage all your financial movements.
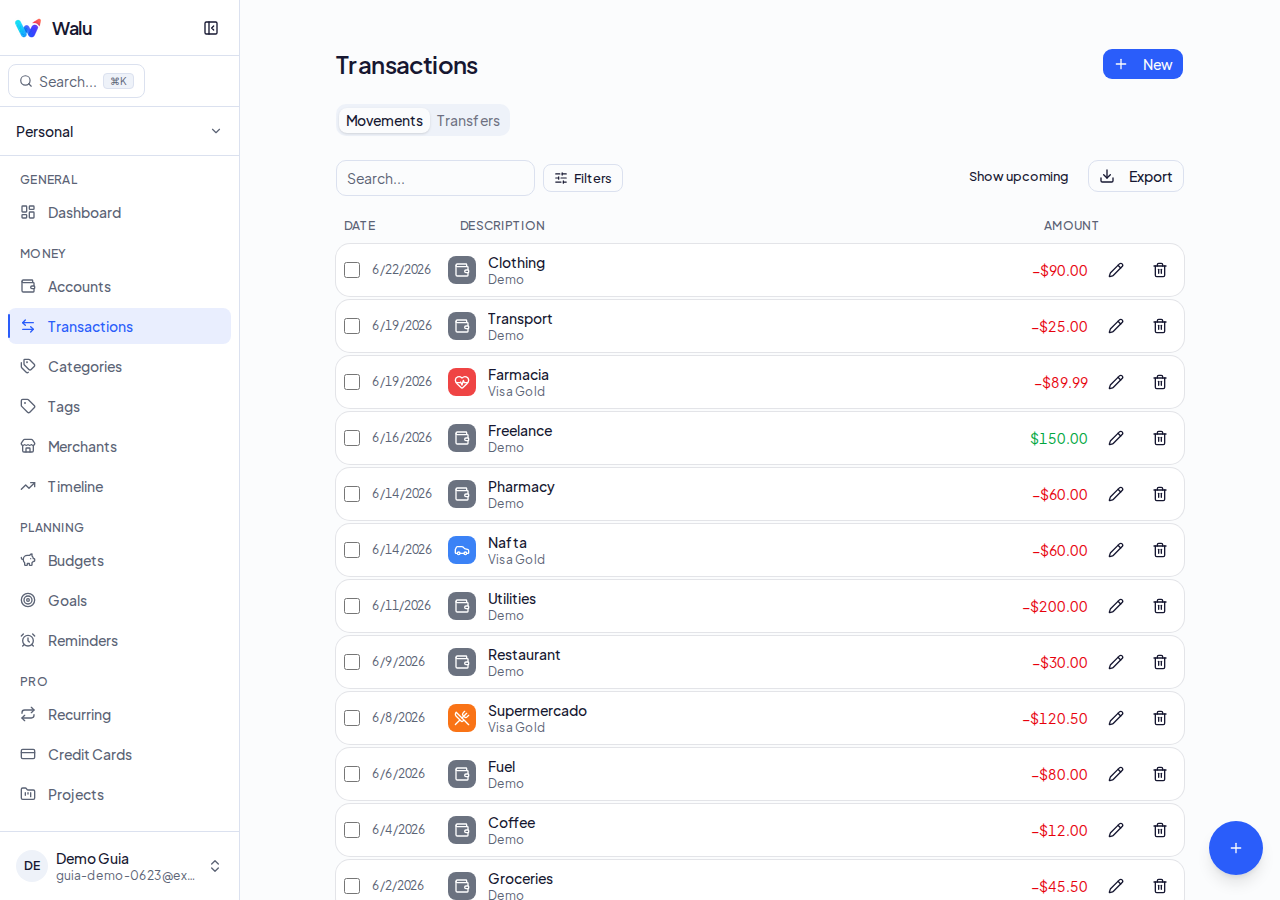
- 1Use the filters (1) to narrow down by date, category, account, type, or tags.
- 2Click a row (2) to edit, or select several and use bulk actions to delete or recategorise.
- 3Tap the + button (3) to record a new transaction from this screen.
Budgets
Control spending by category with a visual traffic light.

- 1Tap a budget (1) to see progress by category: green < 70 %, yellow up to 100 %, red when exceeded.
- 2Tap the edit icon (2) to adjust the limit and enable rollover per category from the budget form.
Goals
Set savings targets and track your progress.
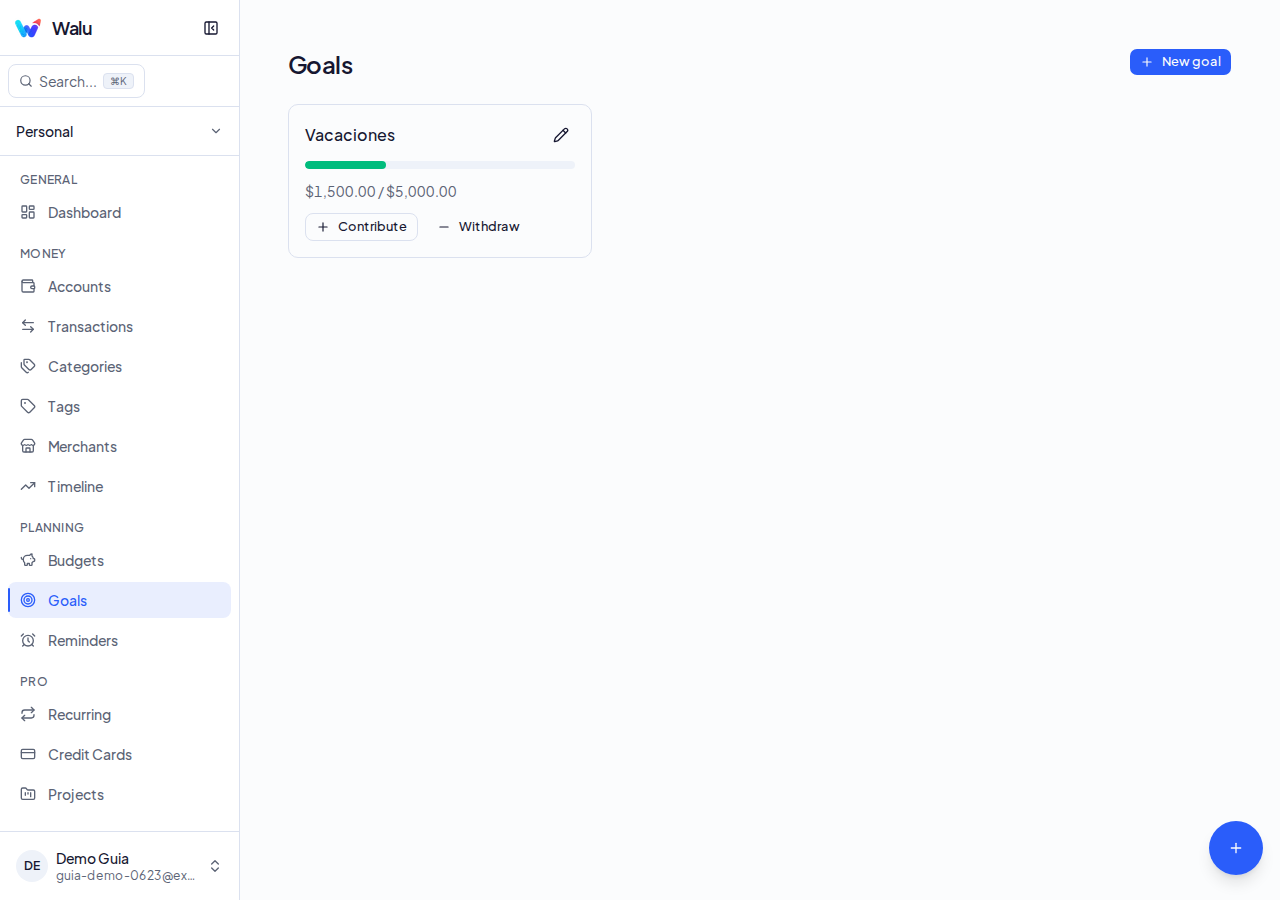
- 1Tap a goal (1) to see progress and the amount saved vs. the target.
- 2Tap Contribute (2) to record a contribution and update the goal progress.
Dashboard
Your financial snapshot at a glance: KPIs, charts, and alerts.
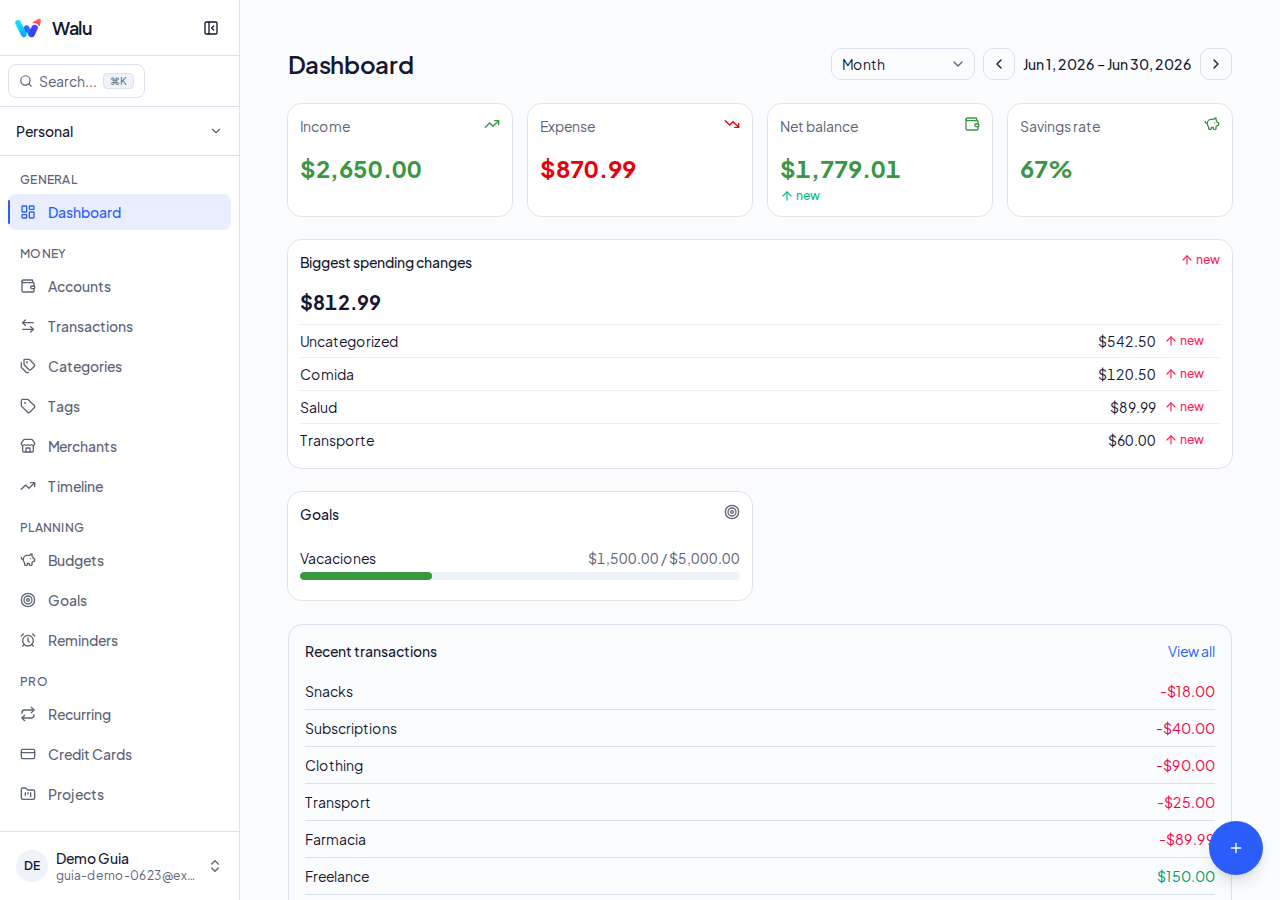
- 1Use the period selector (1) and the < > arrows to navigate between weeks, months, or years.
- 2Review the KPIs and charts (2): income, expenses, net balance, and spending by category.
- 3Read the alerts (3) to spot low balances, exceeded budgets, or pending transactions.
Net Worth
Track your wealth evolution: assets minus liabilities.
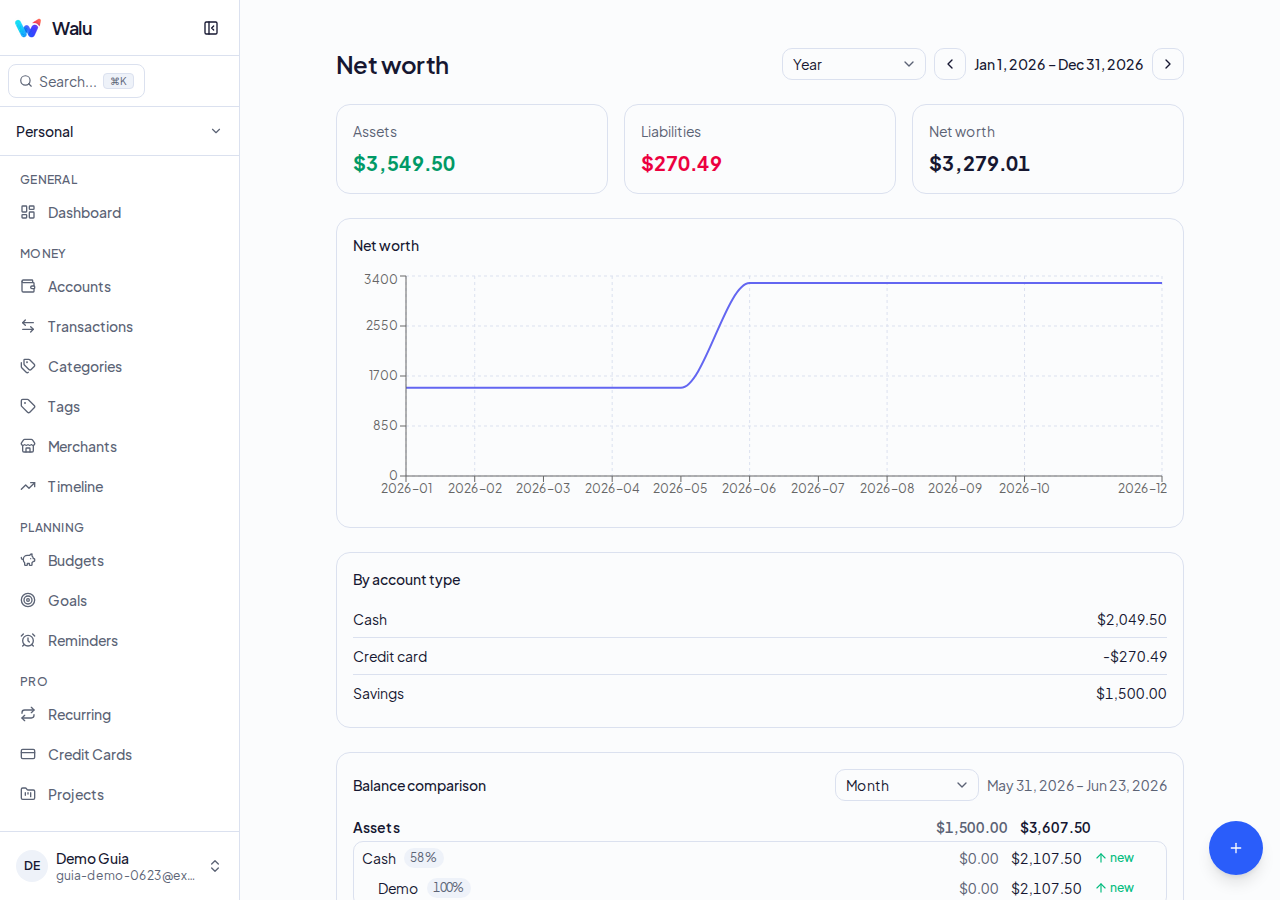
- 1View the evolution chart (1) showing your net worth month by month.
- 2Review the breakdown (2) with total assets (bank, savings, investment) minus liabilities (credit cards).
Timeline
Compare two periods to see how your finances evolve.
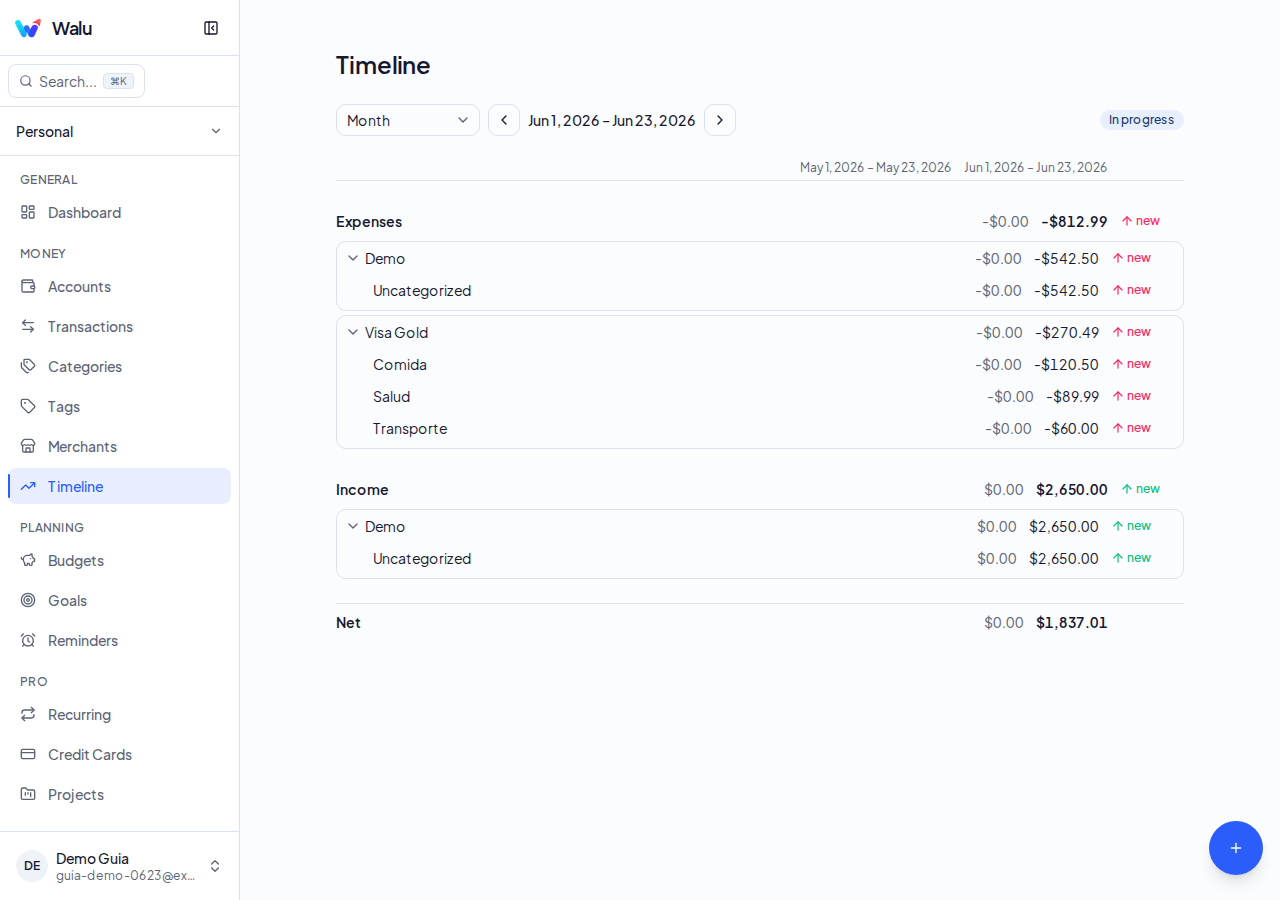
- 1Choose the two periods to compare (1) with the date selector.
- 2Analyse the income and expense bars (2) to identify differences between periods.
Merchants
Discover where you spend most with the merchant ranking.
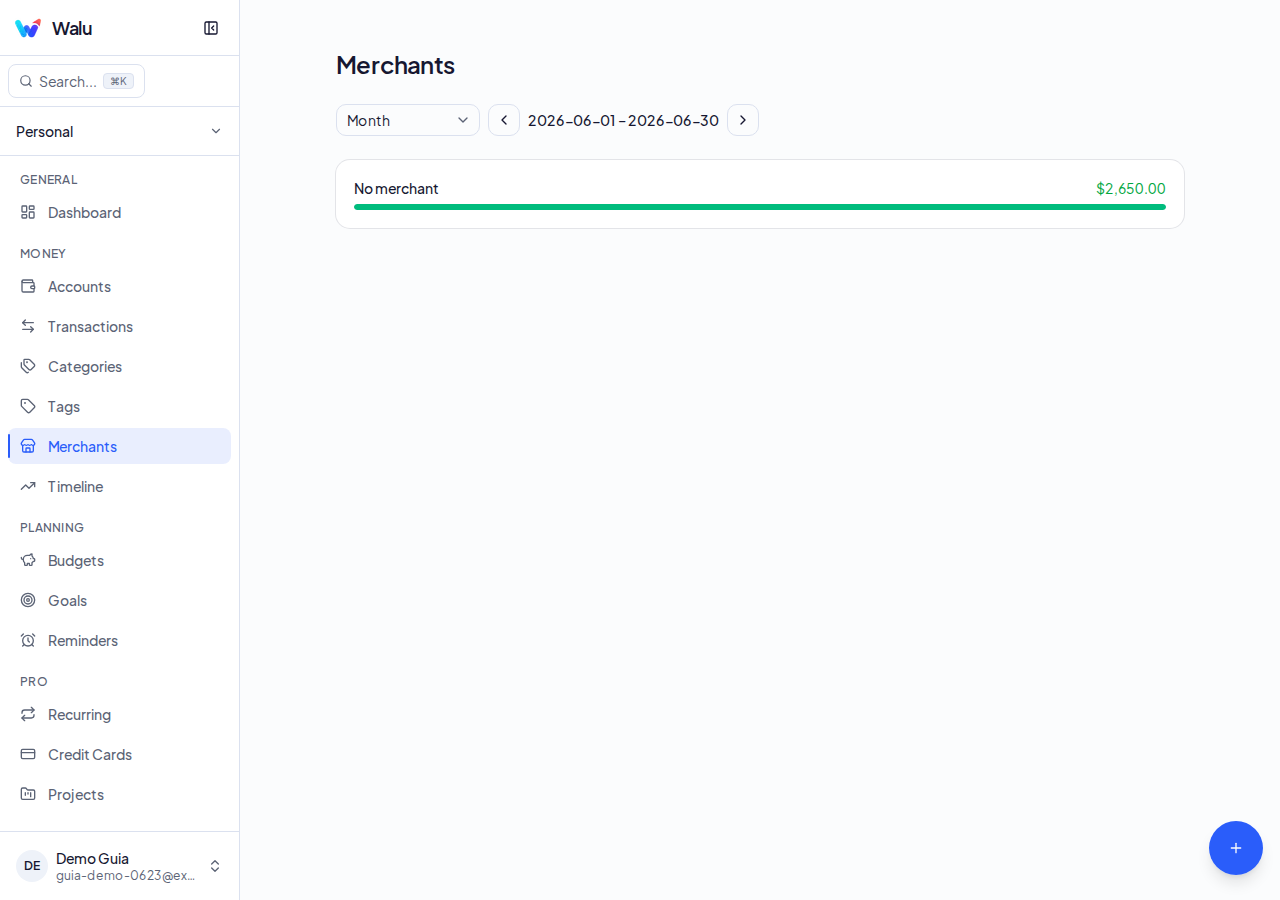
- 1Review the merchant ranking (1) sorted by total spent in the selected period.
- 2Tap a merchant (2) to see all transactions associated with that place.
Reminders
Create alerts so you never miss a payment or important date.
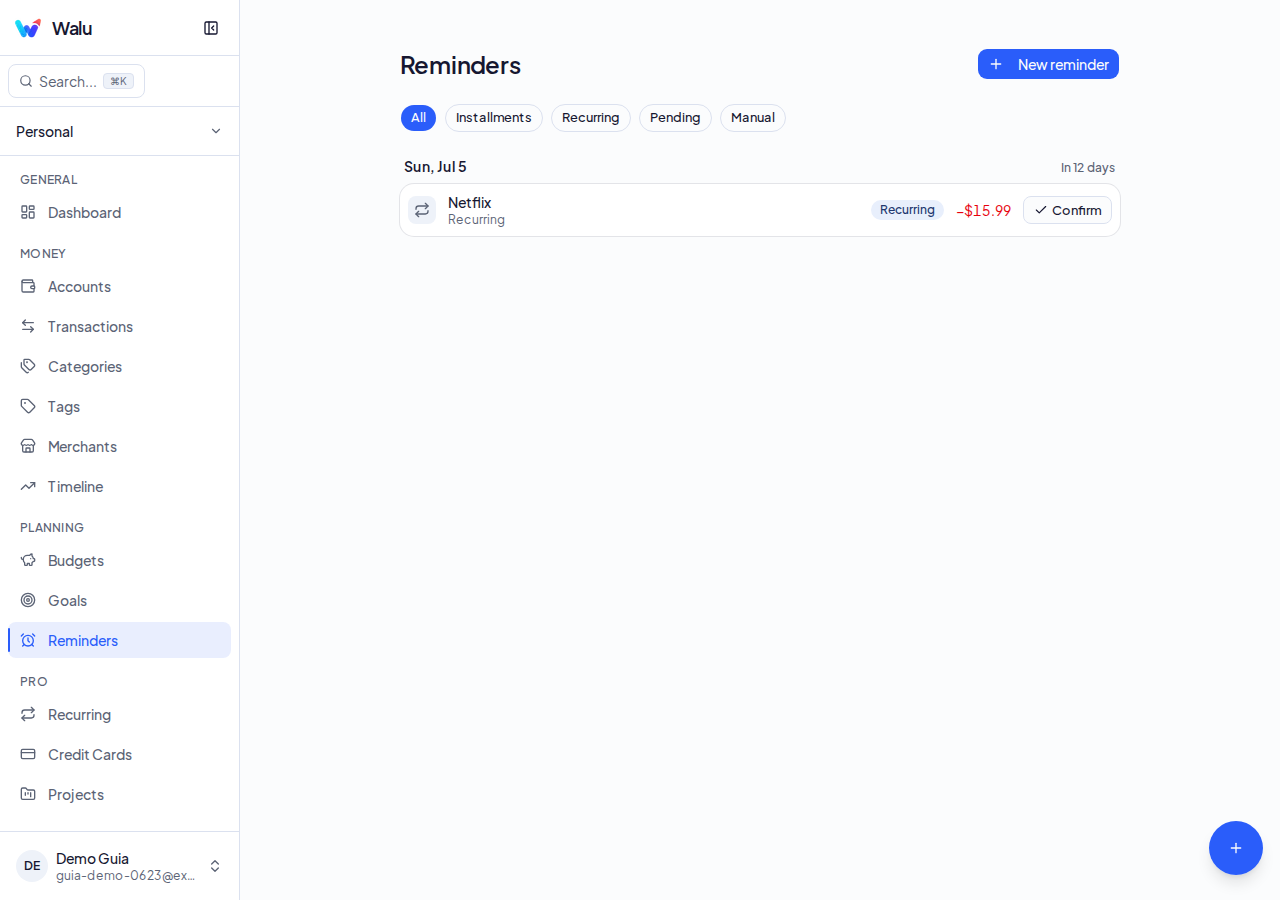
- 1Tap Add reminder (1) and set the name, date, and frequency.
- 2Review the list (2) to edit, mark as done, or delete existing reminders.
Import / Export
Migrate data from your bank or export for backup.
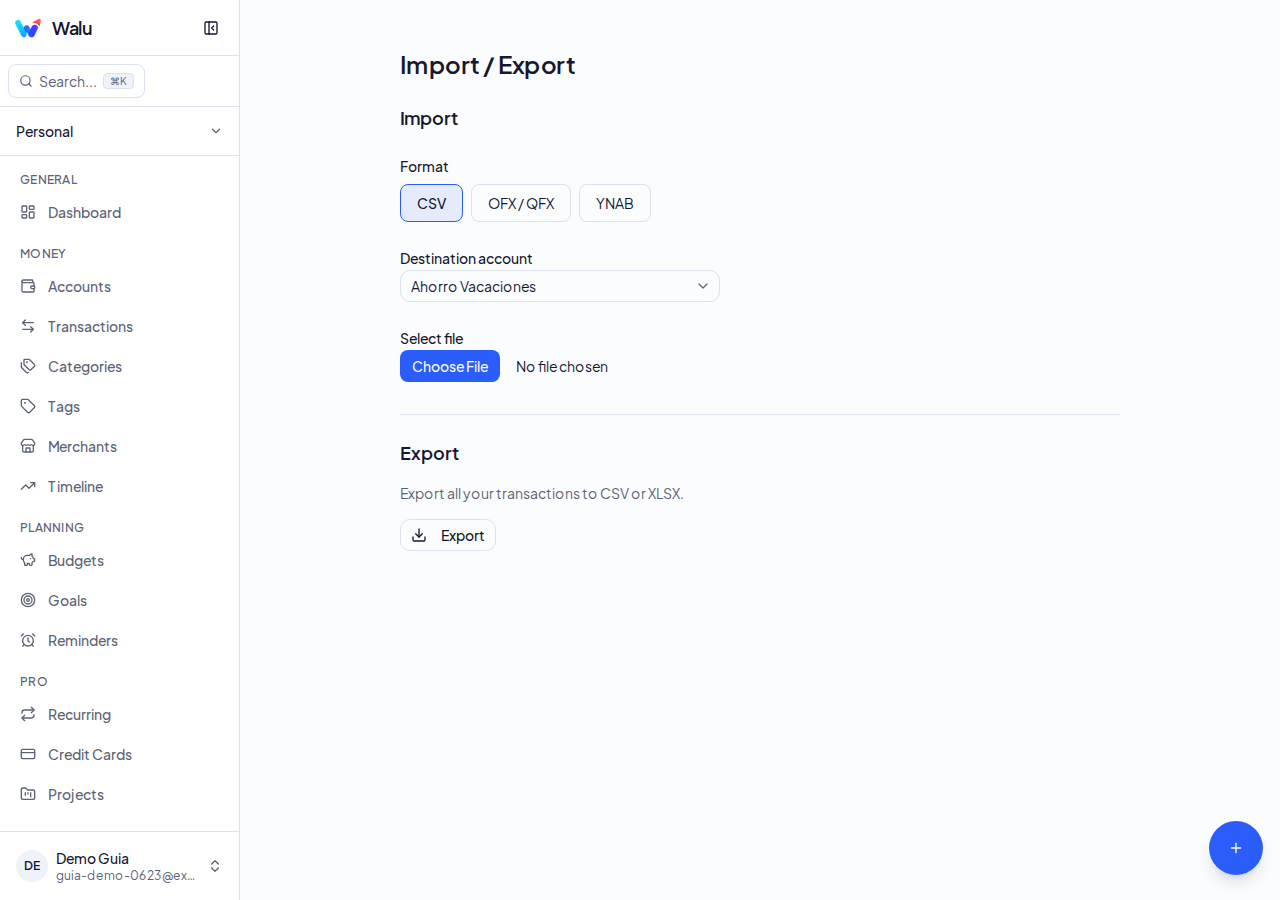
- 1Tap Import (1) to upload a CSV, OFX, or YNAB file and map columns in the wizard.
- 2Tap Export (2) to download your transactions as CSV (Free) or XLSX (Pro).
Settings
Configure language, theme, currency, and account data.
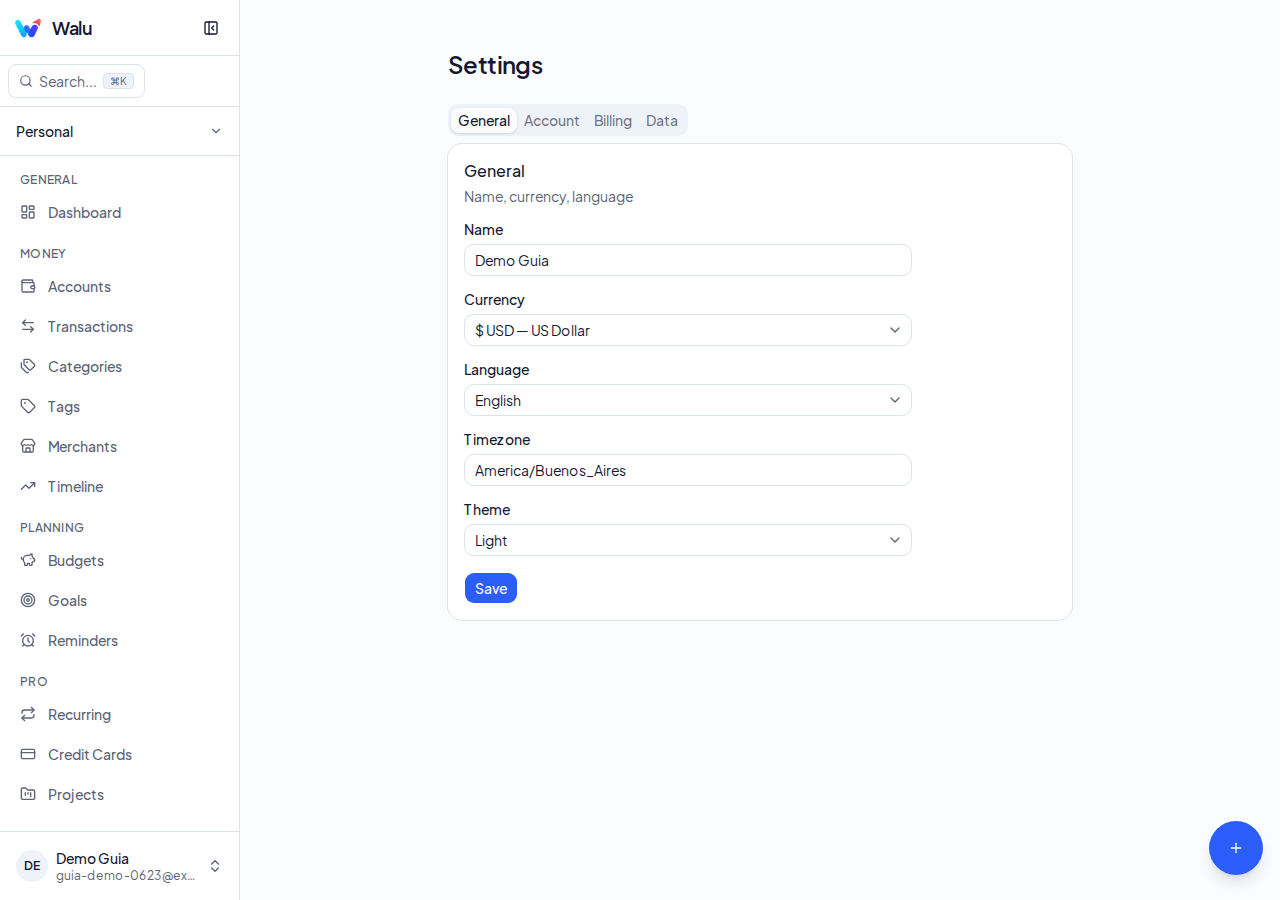
- 1Adjust name, language, primary currency, and theme (light/dark/system) in the General tab (1).
- 2Manage your subscription, change your password, or delete your account from the Billing and Data tabs (2).
Credit Cards
Track your debt, available credit, and instalments per card.
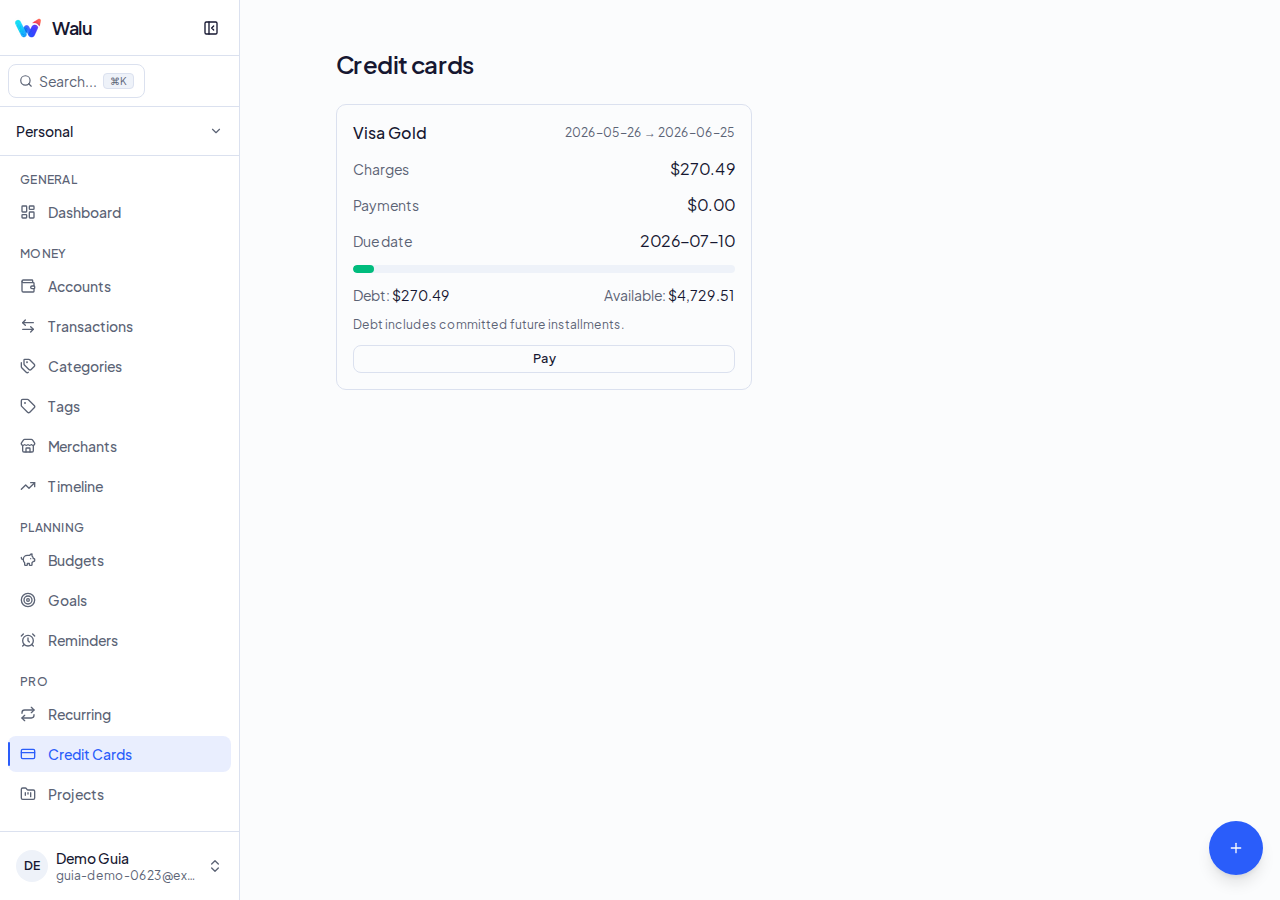
- 1Review the current period summary (1): total due, due date, and available credit.
- 2Scroll down (2) to see active instalments and charges for the closing period.
Recurring
Automate expenses and income that repeat on a schedule.
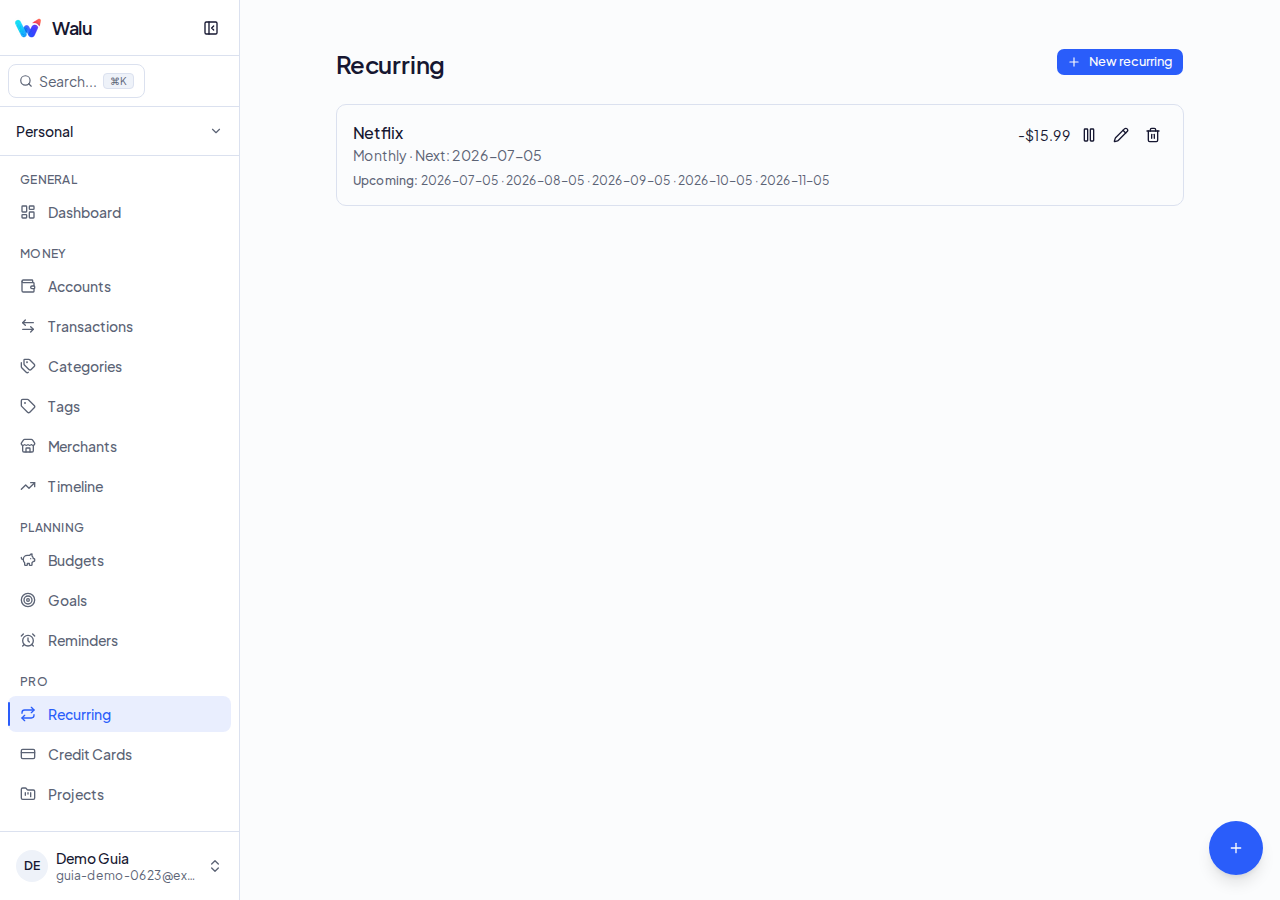
- 1Tap Add (1) and set amount, category, account, frequency, and start date.
- 2Enable or pause each recurring entry from the list (2); the system generates transactions automatically.
Shared Spaces
Share your finances with your family or partner (Pro).
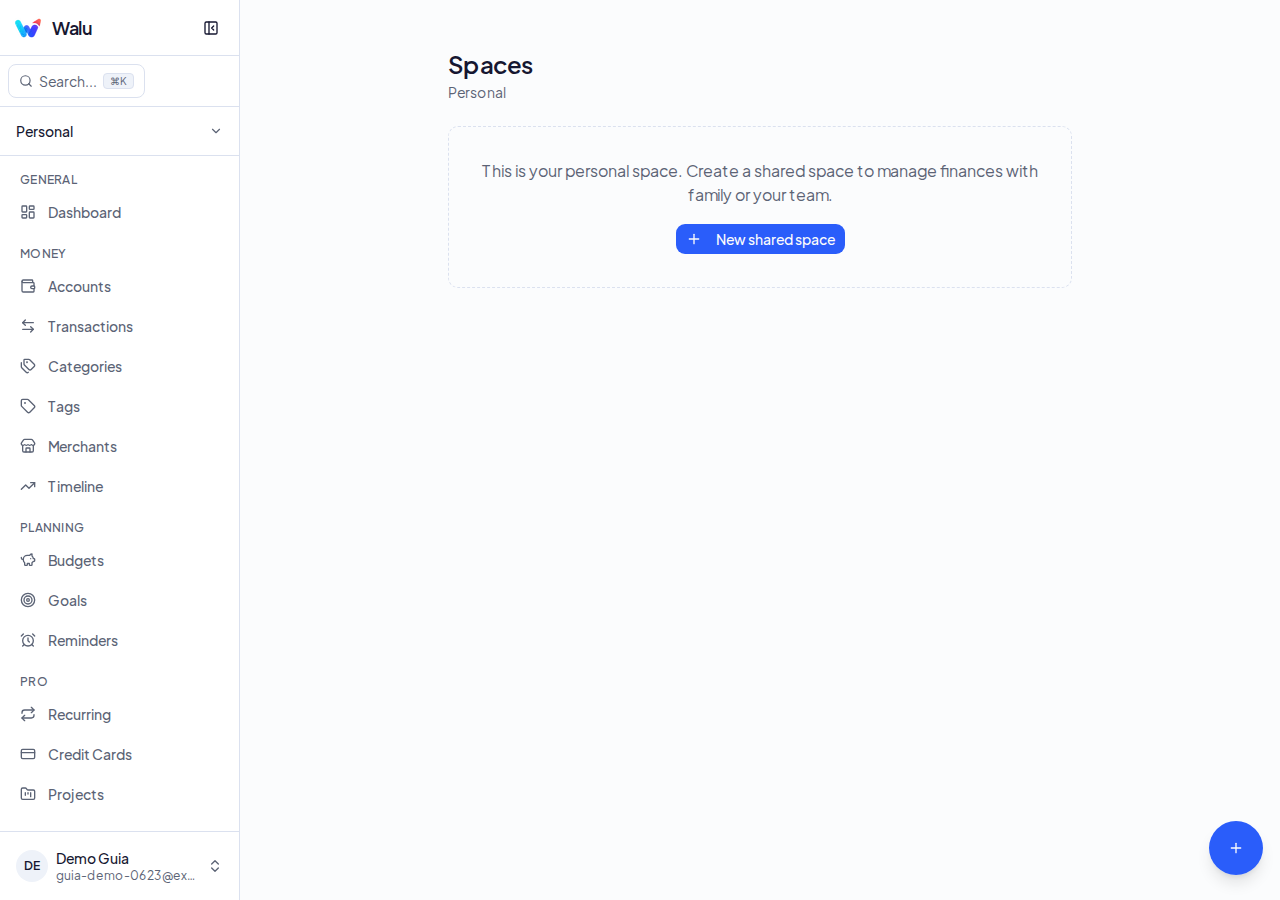
- 1Tap Create space (1), give it a name, and invite members by email.
- 2Choose each member's role in the list (2): Editor can add transactions, Viewer can only view.
Projects
Group expenses by project: trips, renovations, events (Pro).
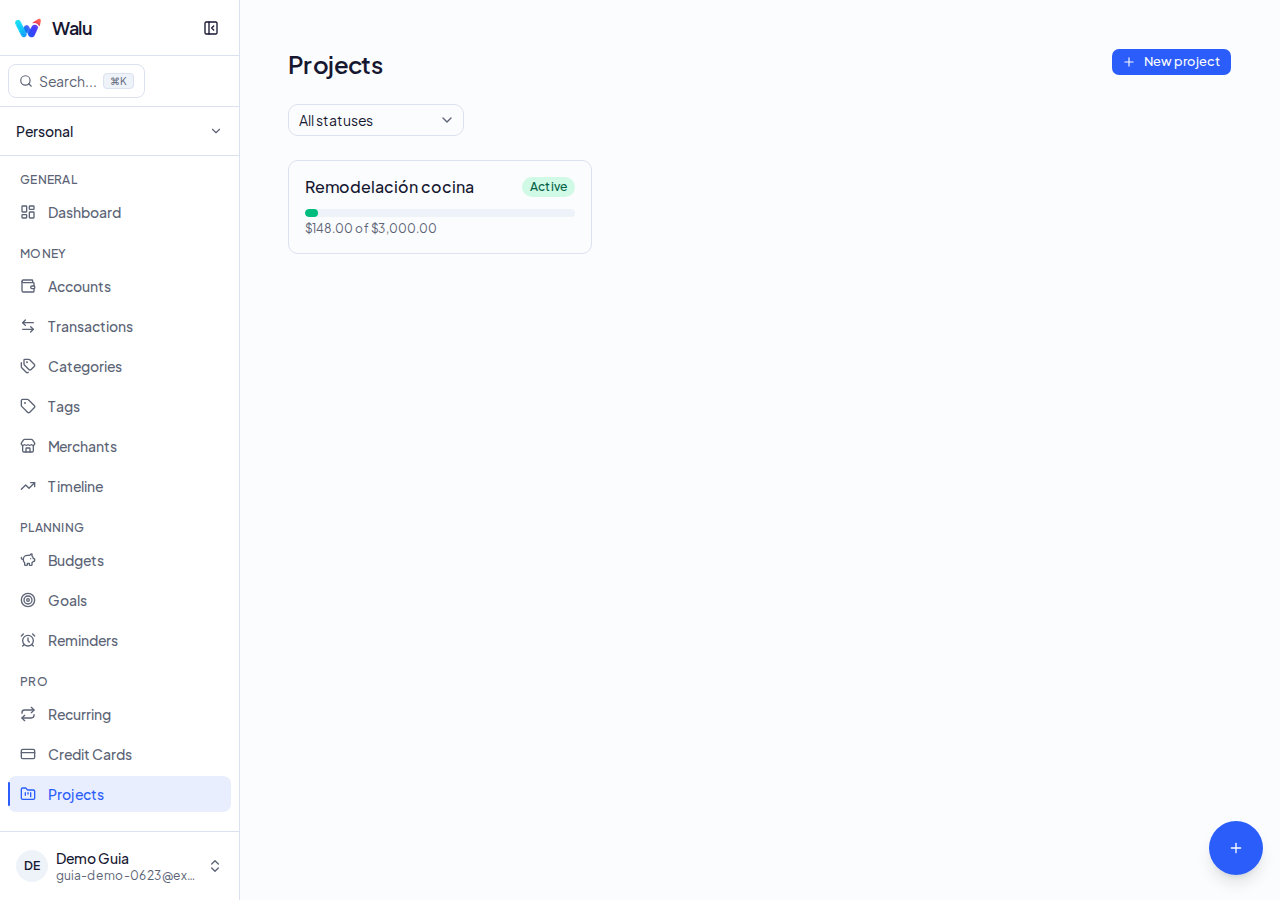
- 1Tap Create project (1), enter a name and an optional budget limit.
- 2Link transactions to the project (2) from the transaction form or from the project view.